
Blog social media share, one stop attribute solution by Pixeto

Introduction
Introducing easy blog social sharing buttons in Webflow! Enhance the accessibility and reach of your blog content with seamless social sharing capabilities. This step-by-step guide simplifies the process, starting with the creation of shareable buttons using link blocks. Select from a range of popular social media platforms, including Facebook, Twitter, LinkedIn, and Pinterest to tailor your sharing options.
With these 3 straightforward steps, you can empower your audience to amplify your blog's reach with just a click.
Step1: Build the buttons with link block.
Creating social share buttons in Webflow starts with designing the buttons themselves that users will interact with. To do this, we use link blocks.
First, determine which social media platforms you want to include in your share options. Common choices might include Facebook, Twitter, LinkedIn, Pinterest, etc.

Step 2: Copy and paste the code
Now that the visual elements are in place, it's time to add the necessary code to enable the sharing functionality.
Start by accessing the custom code for the cloneable, which is located at the bottom of the page , you just have to copy the code and paste it to the page settings , before the body tag.
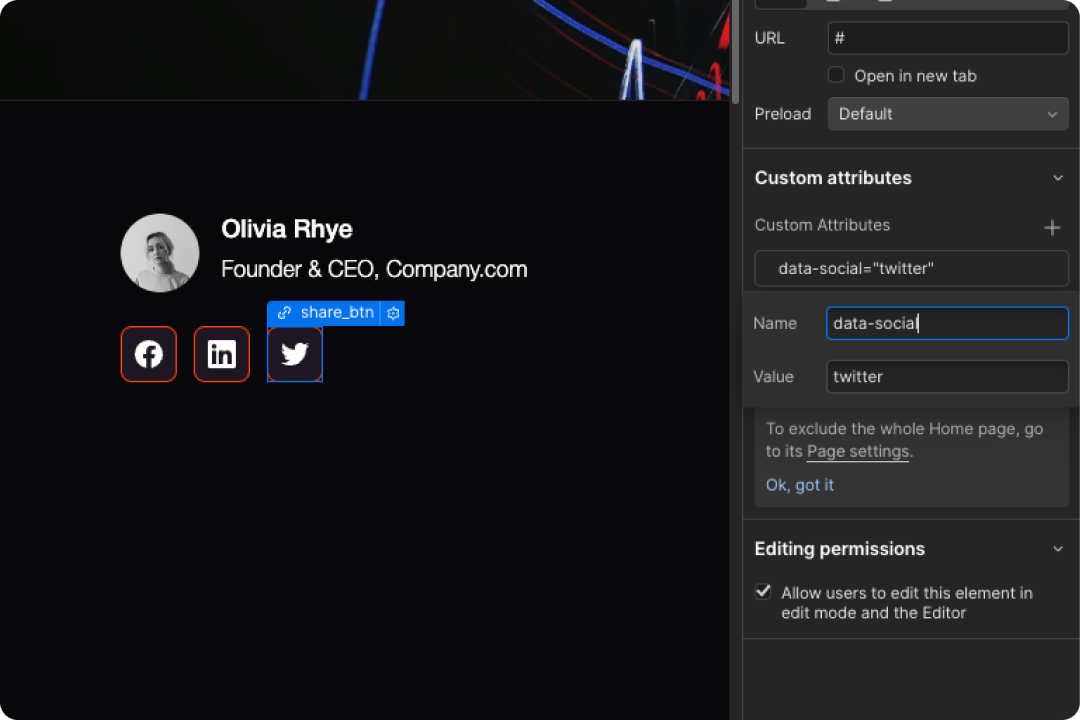
Step 3: Add these custom attributes to the Link blocks
To complete the setup, you'll need to add custom attributes to the link blocks you created earlier. These attributes help the JavaScript code identify and interact with the link blocks correctly.
data-social: [social network name]
eg: data-social: [twitter]

With these three steps completed, your blog page should now feature functional social share buttons that allow users to easily share your content on their favorite social media platforms. This solution provides a straightforward and effective way to enhance the shareability of your blog content, helping to increase its reach and engagement across social networks.